
It is always a matter of embarrassment for parents when their child keeps on scratching their heads due to persistent itching because of the presence of lice on his or her head. If a child has head lice, it has nothing to do with poor hygiene, disease or anything of the sort. Its just a phase of life for almost every child in his school days which will pass as he gets older and is able to learn to keep his head away from other kids. Though lice treatment is not an instant treatment, it is always better to opt for natural ways of getting rid of lice and nits instead of using harsh chemicals. Ways To Kill Lice and Nits Naturally Oiling, Heating and Combing Method Some experts believe that combing and oiling does most of the work. Method 1 Completely oil you hair and scalp with coconut or olive oil or almond oil. Use some good quantity of oil so that it coats your entire hair. Some prefer to use Vaseline and mayonnaise but they are unnecessarily messy, and can be difficult to wash out. However, the choice is entirely yours. Next, cover your hair with a shower cap. Keep it overnight or atleast for 12 hours. Use a blow drier to heat your hair with the shower cap on. Now separate the hair into small sections and comb your hair with a lice removal comb. Then, shampoo your hair with a mild shampoo. Method 2 Follow the first 3 steps as mentioned above. Shampoo the hair without wetting it first. Cover your head again with shower cap. Let the shampoo stay on the hair for half-an-hour. Rinse your hair with water now. Your scalp still feels somewhat oily, but don’t worry. Comb out your hair. More oil will be removed during the sectioning and combing process. You will also notice the lice falling down. Repeat this process on a regular basis, for a week. Then, for the next two weeks, comb through your child’s hair every night to make sure the lice are gone. Essential Oil Treatment The various essential oils available in the market can also get rid of lice: tea tree oil lavender oil aniseed oil cinnamon leaf oil red thyme oil neem oil clove oil eucalyptus oil peppermint oil nutmeg oil You can add 15-20 drops of any of the essential oils with olive or coconut oil. Apply to the scalp and follow the same procedure as above. Once the hair is shampooed and rinsed, you can spray some essential oils on the hair as a preventive treatment. Image Source: closetchat.kidscloset.biz
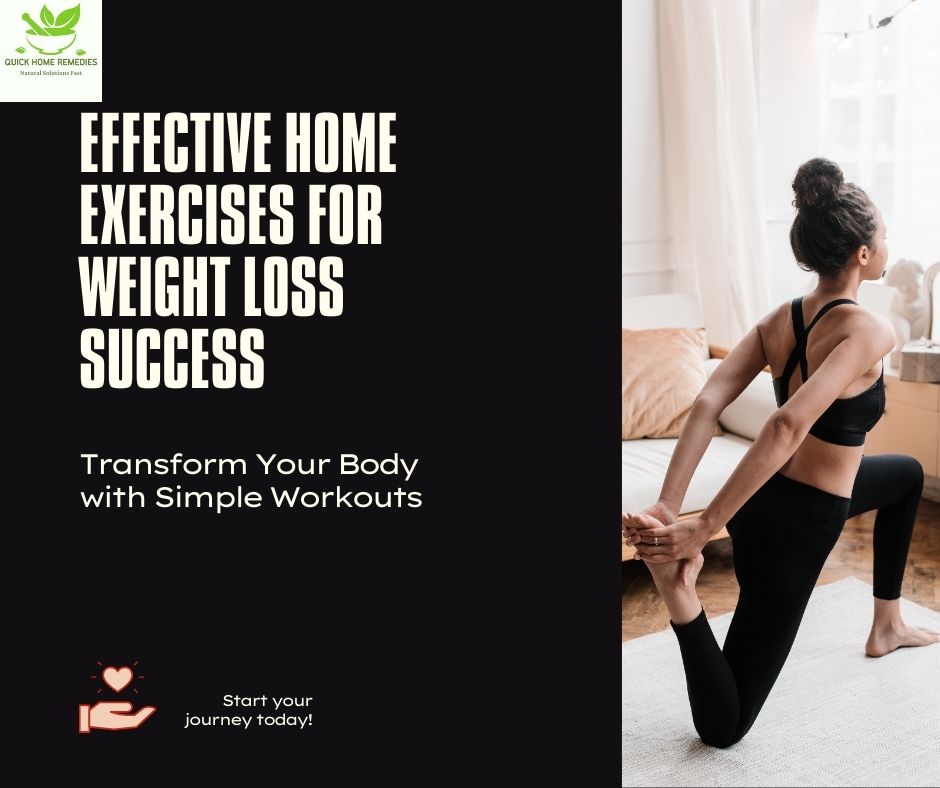
Home Exercises to Lose Weight
Effective home exercises for weight loss Fitness experts say that you easily can lose weight and get fit in the comfort of your home. Well, focus on fitness is always there on everyone’s minds. It is just that people have this opinion in mind that you have to hit the gym to lose weight. But this is not the case. To lose weight means you need to burn calories and the best way to do so is by exercising regularly. Do it in your own home, you don’t have to spend any extra money for it but yes, you have to give extra time for it. Everyday, make it a point to do exercises at home for 30-60 minutes. Follow the exercise regime regularly. Set a schedule to reach your weight goals and you will definitely see the results in a few months time and that too without spending any money on memberships. Now the question is what are those exercises. Always go for exercises that are full body movements that actually copies your everyday movement patterns. Below, we give a list of 5 most effective exercises, easy exercises, that will help you to lose weight. Top 5 exercises to Lose Weight at Home Push-UpsThis is a basic exercise. Raise and lower the body with the support of the arms. Place your hands on the ground. They should be right below your shoulders. Hold your body straight. Now lower your chest by bending your elbows. Push back to the original position. Push Ups to Lose Weight Bridge:This exercise is perfect to strengthen your hamstrings, glutes and abdominal region. For this exercise, you have to lie on your back. And put your arm on your sides. Now bend your knees and raise your hips. See that your back is straight. And keep your feet on the floor. You also have to maintain a straight hip, along with your shoulders and knees. Hold it there for half a minute. Now lower your hips back to the initial position gently. Repeat the same for several minutes. Later on try to hold the Bridge Position for 1 minute for atleast 7 days. Bridge Exercise to Lose Weight Plank CrawlThe Plank Crawl exercise helps you to give a toned abs, back, and shoulders. Start with the push up position, with aligned body, hips and legs. Then lower yourself down with to a plank position. Balance your forearms, elbows and toes. Try doing 15-20 crawls. Push back up one arm at a time into your starting push-up position. Keep on alternating the arm. Maintain a straight body throughout the movement. If you face any difficulty lower your knees to the floor. Plank Crawl Squats: Great your buttocks and legs. In this exercise, you need to couch or sit with knees bent, close to the heels. Extend your arms. Your thighs should be parallel to the floor. Stay in this position for 30-40 seconds and move back to the initial position. Repeat this. It is a full body work out.Gradually, increase holding the squat position for a minute or so for better results. Squat Exercise Walking LungesThis high-intensity exercise strengthens the hips and thighs. Stand tall with good posture. Place your hands on your hips. If you want, you can hold dumb bells. Step forward with one leg (wide step) while simultaneously lifting up onto the ball of the back foot. Keep you knees at a right angle approximately. Stay for few seconds. The step forward the other leg. Repeat it for quite a distance. Walking Lunges Leave a Reply Cancel reply Logged in as quickhomeremediesin. Edit your profile. Log out? Required fields are marked * Message*
Disease and their Natural Health Remedies
Learn about natural health remedies in this section. This section provides you with an elaborate information how alternative health supplements or natural remedies can prevent, treat and cure a number of diseases and conditions. Discover natural health therapies proven to be safe and effective. Natural health remedies can give you a successful alternative treatment option for different health conditions without the potential side effects of prescribed medicines. These natural heath remedies are tried and tested by our ancestors since a long period of time and hence alternative natuarl health remedies are quickly becoming a replacement for many commonly prescribed drugs. The remedies that are given below have been compiled from various reliable websites through proper research and study. The nutritional and health information contained in this section is for educational purpose. The editors of quick-home-remedy.com do not assume liability whatsoever for the use of the information contained in this category. Please use this information as a guide to a better health but always consult your physician before starting any therapeutic program. Normal 0 false false false EN-US X-NONE X-NONE MicrosoftInternetExplorer4 /* Style Definitions */ table.MsoNormalTable {mso-style-name:”Table Normal”; mso-tstyle-rowband-size:0; mso-tstyle-colband-size:0; mso-style-noshow:yes; mso-style-priority:99; mso-style-qformat:yes; mso-style-parent:””; mso-padding-alt:0in 5.4pt 0in 5.4pt; mso-para-margin-top:0in; mso-para-margin-right:0in; mso-para-margin-bottom:10.0pt; mso-para-margin-left:0in; line-height:115%; mso-pagination:widow-orphan; font-size:11.0pt; font-family:”Calibri”,”sans-serif”; mso-ascii-font-family:Calibri; mso-ascii-theme-font:minor-latin; mso-fareast-font-family:”Times New Roman”; mso-fareast-theme-font:minor-fareast; mso-hansi-font-family:Calibri; mso-hansi-theme-font:minor-latin; mso-bidi-font-family:”Times New Roman”; mso-bidi-theme-font:minor-bidi;} Our List of Natural Health Remedies Acne Allergy Allergy Cough Anorexia Appetite Asthma Acidity Anxiety Anger Management Baldness Bleeding Gums Common Flu Common Cold Constipation Cholesterol Enlarged Prostrate Earache Diabetes Gout Pain General Weakness Gall Bladder Headache Heart Heartburn High Blood Pressure HotFlashes Insomnia Itching Low Blood Pressure Knee Pain Liver Cirrhosis Menopause Monsoon Prevention Motion Sickness Memory Nail Fungus Psoriasis Piles Premenstrul Blues Pink Eye Pregnancy Safety Stress Sore Throat Stomach Ache Stomach Disorder Smoking Swine Flu Swollen Feet Triglyrecides Thin Waistline Urinary Tract Infection Vaginal Yeast infection Weight Loss Sexual Urge
Health Articles
Beetroot, Carrot and Apple Juice: Miracle Healthy Drink that Kills Cancer Cells Henna Crown: The Natural Henna Used on Women with Bald Head 9 Cleaning Tips to Prevent from Cold & Infection Scrub Yourself And Shine After A Fabulous Holi Bash How to Survive a Heartattack when Alone? 7 Days Detox Plan to Lose Weight Live Longer Healthy: Health Tips for Men Vicks Vaporub Uses 5 Tips for Christmas 35 Indian Home Remedies For those beautiful, kissable lips: Try these home remedies Some Safety Tips For Those Nine Months Immunity Boosters in the Kitchen
About Quick Home Remedy
Mother Earth is the home to various remedies. Providing some interesting tit bits on various natural and quick home remedies for various problems related to your health, normal sickness, including tips on cleaning, washing, `household tips and so on. Everything in the nature has a purpose; it is up to us to find out whether this purpose is truly beneficial to us as whole. And please don’t forget to send your valuable tips as well. Thanks and enjoy reading. Your suggestions and comments are always welcome. Disclaimer: All information available on the site related to health remedies, natural home remedies are taken from various reliable sources available on the net. The content available on the site is only for general information and not to be considered as medical diagnosis or treatments. Before opting for natural remedies, it is always better to consult your general physician .
How to get rid of split ends? Home remedies for Hair split ends, Split Ends Natural Remedies
Hair splits or split ends is a common problem faced by many. Pollution, use of chemical based products for coloring or curling or straightening, including the chlorine in bath water, lead to hair split ends. While there are certain hair care products which are available in the market, it is always better to opt for natural remedies for this problem. Hair Split Ends Simple Home Treatments to Prevent Hair Splits Oil massage: Regular massage your hair. Use coconut oil or olive or almond oil. You can also use a combination of all oils in equal amount. It is better if you heat it a bit. Apply the warm hair on your scalp as well as on the full length of the hair. Oiling restores hair moisture. Wash with a mild shampoo. Egg and Oil Mask: Take three tablespoons of olive oil and one tablespoon of honey. Mix egg yolk in it. Gently apply this mask on your hair and cover with a shower cap. Leave on for about an hour and wash with a mild shampoo. Papaya and Yoghurt Mask: Mash two small slices of ripe papaya. Mix two tablespoons yoghurt in it. Mix properly and apply this mask on your scalp and hair. Cover your hair with a shower cap and then wash with a mild shampoo after half-an-hour or so. Papaya is rich in proteins. This hair mask helps to maintain the shine, moisture and growth of your hair. Honey rinse: Mix two tablespoons honey in four cups warm water and apply to your hair after you shampoo/condition your hair. Leave it in your hair. This treatment prevents hair dryness and frizz. Banana mask: This is another popular home remedy for split ends. Mash 1 banana. Add 1 egg, 3 tbsp milk, 5 tbsp honey to it. Thoroughly mix it. Apply this paste on your hair and scalp. Wash after 30 min with a mild shampoo. Essential Tips to Prevent Hair Split Ends You know that you get split ends when your hair is not fully moisturized and this happens when your hair doesn’t get enough nourishment. Here are some easy tips to cure or prevent split ends. Use alcohol-free shampoos. Use shampoos with natural ingredients. Shampoo your hair not more than thrice a week. Use a conditioner after every shampoo wash. Let your dry naturally. Towel dry instead of blow drying. Get a trim. Trim your hair once every 3 months to get rid of dry, weak hair. Wash hair after swimming or exercising. The salt in sweat and chlorine in the pool is harmful Oil hair regularly Protect hair from sun Use soft combs Use wide toothed comb to de-tangle wet hair. You Might Also be Interested In: Natural Hair Fall Treatment How to Grow Your Hair Faster? Natural Care for Dry Hair Home Remedies for Frizzy Hair Image Source: idiva.com
Simple Ways to Repair a Broken Lipstick : How to Fix a Broken Lipstick?
It so happens in many cases that the lipsticks that women use break if not used carefully or accidentally. What do you do in such cases? Do you throw away your favourite shade or just keep it with your cosmetics kit without using it? Well, some of you might still try to use the left over portion with a lip brush. Not to worry. If you are really in love with the colour shade and you really don’t want your broken lipstick to part away from you, then please follow these simple rules to repair your broken lipstick. Broken Lipstick Step 1: Take off the broken part of your lipstick. Step 2: Melt the broken part of the lipstick using a matchstick or a candle or lighter. You don’t need to burn the lipstick but carefully melt it, the look of which will be somewhat like the one shown in the figures below: Melt the Lipstic with a Matchstick The look of the Melted Lipstick Step 3: Now place the melted broken piece over the melted lipstick portion. Press it gently. Pressing too hard may spoil the entire container. Broken piece with the melted lipstick Step 4: Shape your lipstick with tooth pick and repair the joint. Do it carefully and very tenderly as the lip colour is not yet fixed properly and may fall off again. Step 6 : Keep the lipstick in the fridge to cool it down. This will let the broken piece set with the melted portion completely. This will take atleast an hour. Step 7: Finally, your broken lipstick is fixed. Once done, clean the lipstick container with a tissue paper. The Repaired Broken Lipstick Step 8: Now, do you want me to tell you the final step? Well, re-use your lipstick. Infact you won’t ever fill that this was your old, broken lipstick. Now please don’t break your lipsticks to do this easy simple trick.
Low Calorie Navratri Diet, Easy Ways to Lose Weight in Navratri, Lose Weight and Eat Healthy in Navratri Fasting
With the start of navratri fasting and feasting season, you won’t imagine how much calorie you can gain. The reason being that in the name of fasting, you end up eating a whole lot of high-calorie food. Let’s take a look at the calories you consume during navratri in one typical thali. 2 kuttu ke atta ki puris- 250 calories 2 pieces paneer kofta- 300 calories 1 katori samak ki kheer- 175 calories 1 serv aloo sabji- 190 calories 100 gm sabudana namkeens- 250 calories This amounts to a whopping 1165 calories. Yes, on a regular basis, if you keep a fast on Navratri, you consume so much calories which will definitely lead to an increase in weight. Navratri Thali So why not try out a low-calorie diet on this Navratri. Eat sensibly and don’t let your fasting ruin your diet. Here are our few suggestions for smart eating so that you can save your calories during navratries. Eat small meals at regular intervals.This will keep your metabolism in good shape. Avoid fried foods. Try to incorporate more of yogurt, smoothies, lassi and fruits. This will maintain the optimum fluids in the body and also keep you full. Instead of puri or pakodas made from Kuttu atta, try out Kuttu ki roti. Replace fried aloo-chat with boiled aloo-chat and kheer with mixed-fruit curd or flavored yogurt. Make some idli and dosa from the samak ke chawal. Limit your potato intake. Milk dishes can be cooked with skimmed milk or double toned milk. Substitute sugar with a low calorie sweeteners or natural sugars . Drink water, coconut water, lemonade (without sugar), herbal teas as much as you can. Eat vegetables like pumpkin and guard in different form like soups and curries to fill you up with fewer calories. Eat kadhi, Thalipeeth and cheelas, which can be made with very minimal oil and are delicious to eat too. Instead of having namkeens and pakodas , have a handful of roasted makhanas or nuts. Drinking low fat milk, lassi and yogurt reduces your cravings to eat junk food.
Beetroot, Carrot and Apple Juice: Miracle Healthy Drink that Kills Cancer Cells
A MIRACLE DRINK , easy to make at home, presented to you …by a famous Herbalist from China. It says that this juice kills CANCER CELLS too. How? Well read on to know more… There is a person by the name of Mr. Seto who had lung cancer. He wants to make it public to draw the attention of people who are suffering from cancers. This is a drink that can protect cancer cells forming in your body or it will restrain its growth! He was recommended to take this drink and for 3 months he took this diligently and now thankfully or miraculously his health is restored, and he is ready to take a pleasure trip. Not only for cancer, even to keep yourself healthy overall, you can try this drink at home. It does not hurt for you to try. Beetroot, Carrot and Apple Juice What do you need to make this drink? You need one beet root, one carrot and one apple. How to make the juice? Wash, cut into pieces and mix them together in a juicer to make the juice and immediately you can drink the juice. For added taste, you can add lime or lemon. Health Benefits Prevents cancer cells to develop. The juice will restrain cancer cells to grow. Prevents liver, kidney, pancreas disease . Can also cure ulcers. Strengthens the lungs Prevents heart attack Controls high blood pressure Strengthens the immune system Good for the eyesight, eliminate red and tired eyes or dry eyes Helps to reduce pain from exercises, physical training, muscle ache Detoxifies your body Assists in bowel movement and eliminates constipation. Also improves bad breath Helps in weight loss Last but not the least, this juice makes your skin look more soft, smooth and radiant. Note: For best results drink this juice immediately from the juicer. Well friends, going by the numerous health benefits, I will definitely try this juice. It is healthy plus without any side effects. So there is no harm in trying it. Also you can share this piece of information to your near and dear ones.
Scrubbing with a Loofah: Its Health Benefits; Benefits of Using Luffa; Tightening up Loose skin with Loofah
Loofah is an organic scrub, which has a number of health benefits. Loofah or luffa is made from a dried up gourd. The medicinal part is the dried network of vascular bundles of the ripe cucumber like plant. When dried, the dense vascular network that makes up the fruit becomes the Loofah. The main use of loofa is to naturally scrub off dead skin cells and at the same time, tighten loose skin after losing weight. It is used to scrub and soften the skin. The luffa plant, a relative of the cucumber, produces large gourds that leave a durable network of fibers after treating and drying the fruit. The resulting mildly abrasive scrubber exfoliates your skin and enhances surface circulation. Loofah Gourd Loofah Scrub Other Names of Loofah Bath-Loofah, Dishcloth Gourd, Smooth Loofah, Vegetable Sponge Benefits of Loofah Exfoliation The outermost layer of your skin, the epidermis, naturally sheds dead skin cells. Normal friction removes some of these shed cells, but others remain in place, which makes your skin dull , your complexion dull and ashy. Exfoliation helps this natural process along, using gentle friction to brush excess skin cells from the skin’s surface. Removing dead skin cells not only improves the look of your skin, it also sweeps away places where bacteria and soil could collect. Improving Blood Circulation Any friction on your skin increases the flow of blood. Capillaries, the tiny blood vessels closest to your skin, naturally expand when stimulated. This is the same effect that we get when you try to warm your hands by rubbing them together to create friction and stimulate blood flow. A loofah has a similar effect, stimulating increased circulation to areas that you scrub with it. Compared to harshly abrasive scrubbers and sponges, a loofah’s firm but elastic fibers are less likely to scratch skin. Myths related to Loofah Loofahs have been considered as a solution to cellulite deposits, but rubbing any object on the surface of the skin cannot change the structure of the skin’s lower layers. Cellulite, the fat deposits that typically appear on the hips and thighs, is no different from subcutaneous fat elsewhere on the body. Like other types of fat, no amount of surface pressure will permanently change its appearance, although a loofah can improve the condition of the skin over the subcutaneous fat. Precautions while using Loofa Loofahs help keep your skin in good shape, but they can also store harmful bacteria in their many tiny holes. Loofahs are also susceptible to decay if kept constantly wet. So always keep your loofah air dry between uses. Washing it in a mild bleach solution could extend its useful life. Also, replace your loofah frequently. A clean loofah has a mild strawlike smell; Avoid using a loofah on any part of your skin with reduced sensation.